Google Groups
Subscribe to The Culinary Creative
Email:
Visit this group

Sunday, July 31, 2011

Hershey's Cocoa Bread Crumb Cookies


More food favorites from the past.  This is fun, by the way, delving into these cookbooks.  I've been coming across some crazy good, and some just plain crazy, recipes.


In addition to yummy choclate recipes, my "Hershey's 1934 Cookbook" (10th ed, 1971), also had a page of helpful Chocolate Hints, some of which I was not familiar with.

Hershey's Cocoa may be used in placed of baking chocolate. 3 Tablespoons of Hershey's Cocoa plus 1 Tablespoon of shortening or oil equals 1 ounce (1 square) of baking chocolate
Do not substitute Hershey's Baking Chips or Milk Chocolate for Hershey's Baking Chocolate in recipes.
Bloom, the gray film that appears on chocolate, occurs when chocolate is exposed to varying temperatures.  It does not affect the taste or qualify of the chocolate.

When melting chocolate for coating and dipping candy centers, be sure all utensils are completely dry.  Also, when adding a shortening to the chocolate to make it more liquid, use only vegetable shortening, not butter or margarine.

Good stuff that.  And now, for our recipe.

Cocoa Bread Crumb Cookies

1/4 cupful butter...1/2 cupful granulated sugar...1/4 cupful Hershey's Cocoa...2 eggs...1 teaspoon vanilla...1 cupful fine bread crumbs. (That's how it's written out in the book.)

Cream the butter, sugar and cocoa together thoroughly.


Add the eggs and vanilla,...


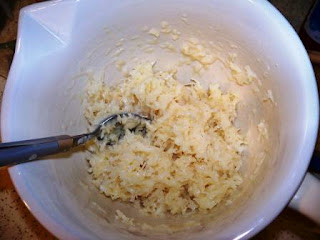
...then the crumbs. (The mixture should be thick as cake batter.)


Spread thin in a well-greased cake pan (8 x 8 x 2-inch), and bake in a slow oven (300 degrees) for 20 minutes.


Cut into squares or rounds, and put together sandwich fashion with jelly or jam.  Ice lightly with any plain or chocolate icing.  Yield: 2 dozen squares.

NOTES

The batter is less like cake batter (which I consider to be fluffy, light and or runny) and more like brownie batter which is thicker and harder to spread.

You could spread more chocolate on these, but I highly recommend a nice, sweet berry jam.  The cookies aren't overly sweet themselves, but with the jam on top it will take placate anyone's sweet tooth.

Check out these "new" butters!  Bought a regular 1 lb box and was more than a little surprised when 8 mini-sticks skittered out of it.  Each is 1/4 cup so makes measuring even easier, as if that was even possible.  (And I'd like to give a shout out to Falling Skies for reintroducing the word "skitter" to my vocabulary, so handy.)


In case anyone was wondering what F-R-O-G Jam is (in first photo), it's a jam I picked up in Newcastle, PA at a local farm stand.  It's made with Figs, Raspberries, Orange peel, and Ginger -- tasty! 

Wednesday, July 27, 2011

Chicken with Curry Sauce


More yummy goodness coming at you!  You know, soup is good food, but soup sauce is even better.  This sauce recipe comes from the "A Campbell Cookbook: Cooking with Soup" (pre-1970).   How could I resist something that came from the chapter titled "Saucery"?


I paired it with pan-prepped chicken.  It's a simple recipe but the curry sauce has a nice mellow flavor.  Though you use curry powder, it's a "soft" curry taste (and I'm quoting Mr. Guinea Pig Parent here), it's not like a super spicy Massaman curry.  The sauce is great with chicken, but also feel free to smother your veggies (like roasted potatoes and onions) with it.  Mmm, Mmm, Good!

Chicken with Curry Sauce

3 chicken breasts
fresh-cracked black pepper
fresh ground sea salt
1 tbsp olive oil

1 can Cream of Celery
1/2 cup milk
3/4 tsp curry powder

De-gross the chicken breasts and cut them into smaller pieces.  I sliced mine length-wise.  Sprinkle them with the pepper and salt.


Heat the olive oil in a skillet over high.  Once it's hot, add in the chicken breasts and cook for 1-2 minutes per side until browned, then drop the heat to medium-low. You may have to cook them for 1-2 minutes, then flip, then flip then flip, until they are mostly cooked through.


In a bowl or deep measuring cup, whisk together the milk and Cream of Celery until well-blended.  Add in curry powder and still to mix.


Pour sauce over chicken breasts in skillet and continue to cook about another 5-6 minutes until chicken is cooked through.


Ready to serve.

NOTES

In lieu of Cream of Celery, you can use Cream of Asparagus (ick) or Cream of Chicken (mmm) instead.

The recipe suggests using 1/4 to 1 tsp of curry powder.  I used 3/4 tsp, but feel free to adjust to suit your own tastes.

If you want to ensure there will be leftovers (and you will want leftovers), I suggest not making this to share with anyone. :)

Sunday, July 24, 2011

Coconut Macaroons


Today, I dove into BordenTM Eagle Brand Condensed Sweetened Milk's "The Dessert Lovers' Hand-Book" (1969) for one of my favorite classic sweets.


Coconut Macaroons
(Makes about 1 1/2 dozen 1-1/2 inch diameter cookies)

2/3 cup Eagle Brand Sweetened Condensed Milk
2-2/3 cups (two 3 1/2-oz. cans) flaked coconut
1 teaspoon vanilla extract
3/4 teaspoon almond extract

In medium-sized bowl, combine all ingredients until well-blended.

coconut used to come in cans, now you can get it in bags


Drop by teaspoons, about 1-inch apart onto well-greased sheet.


Bake in a moderate (350 degree) oven, 8 to 10 minutes, or until lightly browned.


Immediately remove from baking sheet.  Cool.

VARIATION: (this is from the book) GLACE FRUIT MACAROONS: Add 1 cup mixed glace fruit to above ingredients. Proceed as above. If desired, garnish tops of macaroons with whole glace red or green cherry or whole nut meats before baking.

NOTES (this is from me)

Because I am a greedy pig when it comes to coconut goodies, I used tablespoons instead of a teaspoons to drop my cookies.  They will cook more thoroughly if they are smaller.

Once you take the sheet from the oven, I would also recommend letting the macaroons sit for a few minutes to allow them to firm up a bit before removing to cool.

They may spread a out a tidge on the pan when baking, but you can re-form them when you transer them to the cooking rack.  I would lay out a sheet of wax paper so the cookies don't droop through the rack bars.

Glace fruit is another term for candied fruit (which in case you didn't know, glace/candied is a finishing process where the dried fruit is moistened then dipped in a super concentrated simple sugar syrup and allowed to dry).

I topped mine with maraschino cherry halves, but you could use almonds too.  You could also melt some chocolate and dip the macaroons in so that their little bottoms are covered.

Wednesday, July 20, 2011

Hawaiian Tidbits


More fun with vintage cooking, and today I bring you a little treat from the "Chiquita Banana Cookbook" (n.d.).


Once again I have decided to skip the Banana Meatloaf and Ham Banana Rolls and stick with easy snacking goodness.  These are simple and quick to make, but packed full of flavor.  Nice for pre-dinner noshing or light summer desserting.

Hawaiian Tidbits

1/2 cup honey
2 tablespoons water
4 ripe bananas
1 cup toasted coconut flakes or
1 cup finely chopped nuts or
1 cup macaroon crumbs

I used finely chopped pecans.

Dilute honey with water.


Peel and cut bananas into 1" pieces (or something close to 1").


Dip each into honey mixture and roll in either coconut, nuts or crumbs until well coated.


Place on wax-paper-covered tray and refrigerate.

Serve on picks.  Makes 4 servings.

NOTE

The only thing I would do differently is chop the nuts up a little finer so make a closer coating, but even as is, the taste was still simply fabulous and refreshing.

Sunday, July 17, 2011

Peter Pan Coffee Cake


Just got back from a trip to Grandma J's where I was "convinced" to return with some old cookbooks and brought back some real gems including a number of product-oriented cookbooks from the '50s & '60s.  Back in the day (and still sometimes today), companies would put out mini paperback cookbooks featuring recipes using either their food product or recipes made using their kitchen equipment.

I don't know about you, but I love food history, and collecting vintage cookbooks is a fun way to look back at the gourmand evolution in the U.S.  And let me tell you, tastes have changed!

I have a number of these cookbooks in my collection, but have never used them out so thought it would be fun to actually try out some of the recipes and then share them with you.  I'm going to start with "The Peter Pan Peanut Butter Cook Book" (1963).


You can thank me later for sparing you from the likes of Bacon Pinwheels or Meat Morsels, both of which feature savory meats and peanut butter...alright, I think the nausea has passed...instead, I thought I would bring you a delightful morning treat instead.

Peter Pan Peanut Butter Coffee Cake

coffee cake

2 cups sifted all-purpose flour
3 tsp baking powder
1 tsp salt
2 tbsp sugar
1/4 cup shortening
1 egg, well beaten
3/4 cup milk

topping

1/2 cup Peter Pan, peanut butter, crunchy or smooth
3/4 cup firmly packed brown sugar
1 tsp cinnamon
2 tbsp cream

Sift dry ingredients together into a bowl.  With a pastry blender or two knives, cut in shortening until mixture resembles coarse meal.


Combine egg and milk and add to flour mixture, stirring only enough to form soft dough. (FYI, it's actually more like clingy batter than soft dough.)


Spread mixture in greased 8x8x2-inch baking pan. 


Blend together topping and spread evenly on coffee cake.


Bake in moderate (350 degrees F) oven for 30 to 35 minutes.


Serve warm.

NOTES

As an alternate to the cake-like coffee cake, the recipe offers the option to make muffins instead: 

"Delicious, too, baked as muffins, with batter spooned in by halves and "topping" in between. (For muffins, bake at 375 degrees F for 20 to 25 minutes.)"

The coffee cake turned out kind of crumbly, but since it's coffee cake, I think that's totally acceptable.  It's a heavy tasting coffee cake, but the cake itself is actually pretty light and not too dense, goes perfectly with coffee.

Best yet, it will make your house smell cozy, like warm peanut butter.

Wednesday, July 13, 2011

Hagrid's Infamous Rock Cakes


As a final push to get you in the mood for this Friday's opening of Harry Potter, here's another magical treat from the HP cookbook.

The first time Harry and Ron sampled Hagrid's Rock Cakes, they were described as "shapeless lumps with raisins that almost broke their teeth" (Harry Potter and the Socerer's Stone, p. 140).  Unlike their literary namesakes, these rock cakes are actually quite soft...though they still do look like lumps with raisins.

I like them because they're not too sweet and would indeed go rather nicely with a nice cuppa in the afternoon or as a companion for coffee in the morning.  Try them, I promise a trip to the dentist will NOT be in your future.

Rock Cakes
(instructions have been paraphrased for TCC reader clarification)

2 cups all-purpose flour
1/2 cup sugar
1 tsp baking powder
1/2 tsp cinnamon
1/4 tsp salt
1/2 cup (1 stick) cold butter, cut into cubes
1 large egg
1/3 cup milk
1 cup raisins

In a large bowl, combine flour, sugar, baking powder, cinnamon and salt.  Using your fingers, rub the butter into the dry ingredients until the mixture has the consistency of wet sand.

butter cubes
wet sand

In a small bowl, beat the egg and milk together and then pour into the wet sand mixture.  Fold it together.  The dough will be slightly moist and not very stiff.


Fold the raisins into the dough and then drop the dough by rounded tablespoons on a cookies sheet (about 2" apart) on a lightly greased cookie sheet.


Bake at 350 degrees for 12-15 minutes* (mine were done at 13 minutes) until they are lightly browned on the bottom.


Remove cookie sheet from oven and transfer rock cakes to a rack to cool.

NOTES

* The original recipe had a bit of a discrepancy.  It instructs to drop the dough by rounded tablespoonfuls on the cookie sheet and then bake for 25 minutes until bottoms done, but the tablespoon-sized lumps I made only took 13 minutes to cook.  I was able to make 24 rock cakes while they state that their recipe makes only 12.

FYI, three (3) small snack boxes of raisins = 1 cup (or at least close enough to 1 cup to work with the recipe).  I find that it's less expensive to buy a six-pack of snack boxes than one large box.  Just something to consider if you don't eat raisins on a regular basis and want to avoid waste.


I'd like to send a special thanks to my kitchen minion, Cousin Jen, who helped in getting this recipe done and removing the temptation to eat all the rock cakes myself by taking half of them home with her.  It's nice to have family around to help out in a crisis.

Sunday, July 10, 2011

Harry's Favorite Treacle Tart


For those muggles out there who are Harry Potter fans, I hope you will enjoy these next two posts as much as I enjoy bringing them to you from the latest addition to my kitchen library, The Unofficial Harry Potter Cookbook (Bucholz, 2010).  I thought in honor of the upcoming release of the final Harry Potter movie, I would feature a magically delicious recipe or two.

For you muggles (non-wizarding folks) who are not fans...deep sigh...I will endeavor to remember that it is not our appetite for good movies but our love of good food that brings us together and hope you will look at these as interesting new treats as an opportunity to impress any HP fans you know with your knowledge of muggle-friendly culinary delights.

For those in the know, Harry loves him some treacle tart and as it turns out, the recipe in UHPC features currently in-season peaches so this is a chance to try something new to do with them.

Almond-Ginger-Peach Treacle Tart
(instructions have been paraphrased for TCC reader clarity)

Tart Crust

1-1/2 cups all-purpose flour
1/2 cup finely ground almonds
1/4 cup sugar
1/4 tsp salt
1/2 cup (1 stick) cold butter, cut into cubes
1 large egg yolk
1 tbsp heavy cream
1 tsp vanilla

Treacle Filling

1 large peach, thinly sliced
1 cup golden or dark corn syrup
2 cups fresh breadcrumbs (see Notes)
1/2 cup chopped almonds
1 tsp ground ginger
1 beaten egg + 1 tbsp water, for brushing

Combine flour, ground almonds, sugar and salt in a large bowl.

Using a pastry cutter or your fingers, work the butter cubes into the dry mix until it resembles coarse cornmeal.


Beat egg yolk with heavy cream and vanilla, then add to the flour-butter mixture.  Toss with a spatula until the mixture comes together.  Sorry about the lack of photos for the dough-making, there was an "incident" with the egg mixture and in trying to rectify that, photo-taking slipped my mind.

Wrap in plastic and refrigerate anywhere from 2 hours up to 3 days.

Remove dough from fridge.  Use 1/3 of the dough to form a ball, then form a second ball with the remaining 2/3 of the dough.  Put the smaller dough ball in the fridge to keep it cool and firm until needed.

On a heavily dusted work surface, roll out the larger dough ball to an 11" circle and fit it into a 9" tart pan or spring-form pan (highly recommend the latter).  Press it into the bottom and sides.


Lay the peach slices along the bottom of the tart.

Warm the syrup in the microwave until runny (35 seconds will do the trick).  In a large bowl combine syrup with the breadcrumbs, chopped almonds and ginger, mixing well.  Scrape the mixture into the tart shell and spread evenly over the peach slices.


Remove the small dough ball from the fridge.  On a heavily dusted work surface roll out dough to 1/8" thick.  Cut dough into strips with a sharp knife (or pizza slicer) and lay in a criss-cross pattern over the top of the treacle filling (doesn't have to be pretty as you can see from the photo).


Brush the strips with the egg-water wash and bake at 350 degrees for 45 minutes until golden brown.


Remove tart from the oven and allow to cool for 5-10 minutes before removing the tart from the tart pan (or spring-form pan).


Serve warm or at room temperature.  A scoop of vanilla ice cream might not come amiss at this point (or frozen yogurt for those with dairy issues).

All I can say is, Harry would be so pleased.

NOTES

For the fresh breadcrumbs, I used 2/3 of a small artisan white wheat loaf (about 8" long).  I torn up the bread into small pieces before using the food processor to make the breadcrumbs.


I recommend finding a peach that isn't overly ripe because it will make slicing it easier and give you prettier slices, not like the mangy ones I ended up with.  It will also mean less post-slicing juice mop up as well.