Google Groups
Subscribe to The Culinary Creative
Email:
Visit this group

Wednesday, May 30, 2012

Check It Out: Adventures with Chocolate


So while we're talking chocolate, thought I'd tell you about this cookbook I have. If you are a serious chocoholic, you might want to think about adding this to your collection, if for no other reason than to have a super sexy coffee table book that will make both you and your friends drool.

Adventures with Chocolate: 80 Sensational Recipes by Paul A. Young (Kyle Books, 2011) is pretty luxurious. I will give you a heads up, though, that Paul is from the UK so there may be some translation needed to find substitutes for some of the listed ingredients. For example, I learned that demerara sugar is like Sugar in the Raw (or at least that's what I used).  

In the first part of the book, he talks about how to buy the right chocolate and how to identify (in a little more detail than I had) the different types of chocolate and then goes into how to make truffles.

And from there, oh from there, it's got some truly decadent recipes with some seriously sassy photos. Some of the recipes you could try out are Dark Chocolate Sorbet, Hand-rolled Wild Strawberry and Pink Peppercorn Truffles, Chocolate and Almond Tortellini with Blood Oranges and Pine Nuts, Wasabi and Green Apple Ganache, and Honey-cured Bacon, Stilton and Chocolate Sandwich.

So if you like truffles and flavorful ganaches and the evil wonderful ways of chocolate, you're going to want to add this to your collection.

More info about the book -- hardcover, ISBN 978-1-906868-05-5, 144 pages, full color photos by Anders Schonnemann, $24.95.
  

Sunday, May 27, 2012

Chicken Mole


In a most timely manner, Mom decided to try out a mole recipe this weekend.  It's the first time I've ever eaten mole and it was on the agenda for a savory choc post anyway so she shared with me to share with you.  What I'm passing along to you is based on the recipe she used from her South Beach cookbook (it's a Phase 1 recipe in case anyone is interested, minus the rice that is). 

Chicken Mole

3 large chicken breasts, cut into large pieces
salt & ground black pepper
1 lg onion, chopped
2 tsp minced garlic
2 tbsp chili powder
½ tsp cinnamon
½ tsp ground clove
1 (14-½ oz) can diced tomatoes
2 tbsp creamy peanut butter
2 tbsp cocoa powder
Scallions or chives for garnish

Sprinkle the chicken with salt and black pepper.

In a large skillet with coating of olive oil cooking spray, cook chicken for approximately 8 minutes over medium-high heat until browned.


Remove the chicken to a large plate and set aside.


Add the onion and garlic to the skillet and cook for 3 minutes, or until the onion becomes translucent.


Stir in the chili powder, cinnamon and cloves and cook for 1 minute.


Return the chicken to the skillet then add in the tomatoes, peanut butter and cocoa powder.


Bring everything to a boil.


Then cover and simmer, stirring every few minutes, for 25 minutes or until the chicken is no longer pink.

Serve over arroz amarillo (yellow rice aka super yummy rice) and garnish with scallions or chives.

Es muy delicioso!

NOTES

Since I don't really like super chunky tomatoes, I threw my can of dices in the blender for a few seconds to break them down.  Still gives some texture to the sauce.  If you want a slightly smoother sauce, you can use tomato sauce instead of diced tomatoes.

You can serve it over rice like I did or wrap it up in a tortilla with the fixin's.  I chose yellow rice because it has a slightly sweeter taste and makes a nice foil to the spicy chocolately-ness of the mole sauce.  Either way, it will be tastetastic!

Wednesday, May 23, 2012

Let's Talk Choc


Since I’ve gotten some good feedback on the oil post, I thought I’d try another Spy v. Spy and talk about the difference between types of chocolate. Throw in some fun facts and voila! Chocolate Post! And of course this will be followed-up with some examples of what to do with chocolate besides shoving it in your face. For those who are not sweet fans (and yes, I know you’re out there), I’ll see if I can’t come up with at least one savory recipe for you to try using one of the world’s most favorite treats.

Chocolate is produced from the seed of the cacao tree. The earliest documentation of its use is from around 1100 BC and it has been cultivated for, oh, EVER in Central and South Americas and Mexico. Early Mesoamericans made it into a beverage called xocolātl (Nahuatl for “bitter water") which was savory and flavored with chiles and cinnamon.

Because the cacao tree seeds are intensely bitter in taste, they have to be fermented to bring out their flavor. Once fermented, the cacao seeds are dried, cleaned, roasted, and de-shelled to make cacao nibs. The nibs are ground up to make what’s known as cocoa mass which is a rough form of pure chocolate.

The cocoa mass is also referred to as chocolate liquor because it has to be liquefied before being molded and mixed with other ingredients.  And the chocolate liquor can be made into either cocoa solids or cocoa butter.  Then all of your basic chocolates are a combination in varying proportions of the cocoa solids and cocoa butter.

CHOCOLATES

Baking Chocolate – also known as unsweetened or bitter chocolate is almost pure chocolate liquor but had just enough fat added in to make a solid substance. It has a deep, strong chocolate flavor. Not recommended for outright eating.

Dark Chocolate – also known as semisweet or bittersweet (depending on its color) is produced by adding fat and sugar to cocoa. It contains either no milk or much less milk than milk chocolate does. In Europe, dark chocolate is only considered such if it contains a minimum of 35% cocoa solids. Dark chocolate can be used for baking or consumption and is very popular these days because of its high antioxidant properties.  If you haven’t tried Dark Chocolate Raisinets, do it now, it will change your life.

Milk Chocolate – is the most commonly consumed type of chocolate. It is dark chocolate (which has already been mixed with fat and sugar) to which some type of milk – milk powder, milky milk, or condensed milk – has been added.

Hershey Chocolate – is milk chocolate which has been processed using a by-all-accounts secret company method that adds that distinct and subtly tangy taste that has made it such an addictively popular product.

White Chocolate – is not technically a true chocolate but rather a confection that uses cocoa butter mixed with sugar and milk. Because it doesn't include cocoa solids, it is white or yellowy white rather than brown in color.

Cocoa Powder – is made by pulverizing chocolate liquor that is partially defatted and removing practically all the cocoa butter. The type most commonly found on grocery shelves is Dutch-processed cocoa powder. The Dutch-process incorporates additional alkali to neutralize the cacao’s natural acidity.

Cacao v. Cocoa – the basic difference is that cacao refers to the tree, pods and beans that produce chocolate while cocoa refers to the by-products made from the cacao beans. The terms tend to be used rather interchangeably by all but the chocolate conoscenti (and most likely by me too throughout this post).

RANDOM CHOCOFACTS


Cocoa solids contain an alkaloid called theobromine which is the substance that makes chocolate toxic to animals, in particular cats and dogs.

In early Mesoamerica, the Aztecs demanded tribute in the form of cacao beans from the areas they conquered who grew cacao. Chocolate played a special role in religious events; the cacao seeds were used as offerings to the gods and served chocolate drinks during sacred ceremonies.

In 16th century, chocolate was introduced to the European community.  By the 18th century, chocolate was being prescribed by physicians as a cure-all and an aphrodisiac. I think they were seriously onto something (no wonder they called it the Age of Enlightenment).

Domingo Ghirardelli started out as a supply shop owner in California during the gold rush. He stocked chocolate delicacies in his store to take advantage of the fact that miners who struck it rich would want to spend it on luxuries like chocolate.

“Bridge Mix” is a mix of solid chocolates, chocolate-covered fruits, and chocolate-covered nuts first made popular 1920s when card parties were a common form of social gathering. Through the 1950s, the small pieces with their tempered chocolate coating made them the ideal snack food for card players who didn’t have to worry about getting sticky fingers while playing.

M&Ms were first introduced in WWII for military consumption. Their hard candy coating kept them from melting while soldiers enjoyed them in the fields. No muss, no fuss and easy to travel with. Forest Mars, Sr, patented the process  for making the candy coating and the first five M&M colors were brown, red, yellow, green and violet.

Sunday, May 20, 2012

Strawberry Custard Tart


Since strawberries are in season and we're heading into that time of year when dining al fresco with friends becomes the norm, I thought I'd throw together a little throw-together dessert for you.  Relatively quick, very easy, and light for those last minute dinner occasions.

Strawberry Custard Tart

Jell-O Cook & Serve Custard mix
2 6-pk Keebler Graham Ready Crust mini pie crusts
1 quart fresh strawberries
1 large sprig fresh mint, chopped
1 tbsp honey
whipped cream (Reddi-Whip or Cool Whip)

Prepare the custard according to box directions.  When you put the custard in the fridge to set, if you cover it with a sheet of plastic wrap, pressed onto the surface, it will prevent a skin from forming on it.  It'll take 10-15 minutes to prepare the custard and about 1 hour to set.


Once the custard is ready, hull and rough chop 6-7 large strawberries (or 9-10 smaller ones).


Put in a food processor or blender with the honey and chopped mint.  Blend until roughly smooth.


Fill the bottom of each tart crust with a spoonful of the strawberry puree.


Then spoon custard over the strawberry puree in the tart crust.  You don't want to fill it all the way to the top, but just to below the top of the crust.


Slice 24-26 strawberries and lay slices on top of the custard.  Each tart will take approximately 2 strawberries worth of slices to cover it.


Serve with a dollop of whipped cream and garnish with some small mint leaves.  Ready to serve.


NOTES

You could use ready-made vanilla pudding in lieu of custard because I know not everyone is as big a custard fan as I am.  You could also substitute chocolate pudding or chocolate custard for the vanilla.

FYI, these work best in tart form, would have to make some adjustments to make it work as a larger pie.  This is because the mini crusts comes in a holder so even though the strawberry puree and custard tend to be runny they won't run anywhere but in the small tart pie pan.

If you are using Reddi-Whip only put it on right before you serve because it doesn't hold up for very long.  If you are planning to pre-prep or travel with, I would recommend using Cool Whip instead.

Both the graham crust and whipped cream can be made from scratch, but it kind of defeats the purpose of assembling something (relatively) easy and quick. :)


Wednesday, May 16, 2012

Oil v. Oil

I was asked by my cousin Jen if I could do a little write up to clarify the difference between vegetable oil and canola oil. Thought that was a great idea and that I could actually expand on that to talk about a couple of other commonly used oils as well.

Looking back through my culinary notebooks, I found a nice little section that talked about "Fats in the Kitchen." While nutritionally fats are not necessarily good for you (understatement), in the kitchen they are essential. Fat is where your flavor is and you use fats to bake, fry, cook, and dress (as in salads).

You should probably be aware that not all oils are interchangeable. Some of better for baking, some are better for stove-top use, and some are better for frying…and even within that category some are better for frying at high temps while others are better for frying at low temps, depends on their smoking point. Smoking point refers to the temperature at which a cooking fat or oil breaks down and, literally, starts to smoke. The smoking point is also where the flavor and any nutritional value start to degrade (degrade = bad, but then again so does smoke in a kitchen).

COOKING OILS

So what are the most common types of oils used in the kitchen?

Vegetable Oil – most veggie oils are a combo of various oils. The most commonly used ones are corn, soybean, palm, and sunflower, all of which have very high smoking points, between 440-460°F, which make vegetable oil good for high temperature frying. It’s also great to use in baking, not so much for your salad dressing mixes though. Unfortunately, veggie oil is high in omega-6 fatty acids so doesn’t make it a strong nutritional candidate.

Canola Oil – canola is made from rapeseed, a type of (bright yellow) field mustard. Nutritionally, next to olive oil, this is your best bet. It can be used for frying, but at medium temperatures (smoking point of 400°F). It’s good for baking, but can also be used in salad dressings. Canola oil is low in saturated fats (bad fats) and high in monounsaturated fats (good fats) and has omega-3 fatty acids (also good for you).

Sunflower Oil – is made from sunflower seeds. It has a moderately high smoking point at 440°F. It’s low in saturated fats and high in vitamin E (a fat-soluble antioxidant). I read that because it has some health benefits, it is preferred by companies to use in making their snack foods (e.g., chip companies). It can be used to fry, bake or dress.

Peanut Oil – is made from peanuts. While most highly refined peanut oils have removed the allergens to make it safe for use/consumption by the majority of people with peanut allergies, if you’re not sure about it, then I recommended not using it at all. Its smoking point has been listed anywhere from 437-450°F which means it’s good for high temperature frying. In fact, it’s the most commonly used oil to fry turkeys with at Thanksgiving.

Olive Oil – is considered the healthiest of oils being that it is very high in monounsaturated fats. While it is great for dressing of the salads and stove top and low temperature cooking, it’s not a great high temperature frying oil. I have used olive oil in some specialty baking products, but for cakes and pies, I find it doesn’t work as well as some of your other oils.

HOW TO

Store – no matter what kind of oil you have, you should make sure to store them at room temperature where they can maintain their liquid state. In a dark, dry place like a pantry is best. Oils with high monounsaturated content will keep up to a year that way. Certain refined olive oils will keep up to a couple of years. The shelf life of most other oils is approximately 6-8 months after opening.

Dispose – the best way to get rid of any used oil is to put it in a leak proof container and take it out with your regular garbage. Alternatively, you may be able to take it to a special disposal facility (where you take used oils and paints). You should NEVER pour it down your sink drain because oils have a tendency to congeal, especially at cooler temperatures, and will block your pipes, messy and expensive to fix.

Thanks, Coz, for your question. I actually wasn’t familiar with the distinction between the first two types of oil myself and now we all know! (We are getting SO smart.)


Sunday, May 13, 2012

Mother's Choice: Sunday Apple Fritters


A hearty congraduations to all those earning degrees this weekend and a most wonderful Happy Mother's Day to those celebrating their special day today!

In honor of the holiday, today's recipe was chosen by Guinea Pig Mom.  We went back to one of my other favorite cookbooks to try this one out for you.  From the Southern Living Off the Eaten Path by Morgan Murphy (Oxmoor House, 2011), she asked me to whip up a batch of yummy apple fritters from Lucille's Roadhouse in Weatherford, Oklahoma.  You gotta love a woman who's happy with fried dough for a gift.  I love you Mom!

Sunday Apple Fritters
Oklahoma, page 181, Off the Eaten Path

Canola oil
2 cups all-purpose flour
2/3 cup sugar
1-1/2 tsp baking powder
1 tsp salt
2 large apples, unpeeled and finely chopped (about 3 cups)
2/3 cup milk
2 tsp vanilla extract
2 large eggs
Powdered sugar

Pour oil to depth of 2 inches into a Dutch oven (or electric wok); heat to 350 degrees.

Combine flour and next 3 ingredients.  Stir in chopped apples, tossing gently to coat.


Make a well in the center of the mixture.  Whisk together milk, vanilla, and eggs until blended.


Add to flour mixture, stirring just until dry ingredients are moistened.


Drop batter by rounded tablespoons into hot oil. 


Fry fritters in batches, 1 to 2 minutes on each side, or until golden.


Drain on paper towels.


Sprinkle fritters with powdered sugar.  Makes 3 dozen.

NOTES

Off the Eaten Path author's note -- "We tested with Braeburn apples." And so I figured why not do the same. In post-consumption discussions with the Guinea Pigs, it was decided that you could also use not-totally ripe peaches, firm strawberries, pears, or mango in lieu of the apples and it would work well too.

The reason I used an electric wok to fry mine up was because (and I know this may come as a shock), I don't actually own a Dutch oven.  But the advantages to using the wok instead are (1) I can still set the temperature easily and (2) because of the shape of the wok, even though I use less oil I still have a wide surface area to fry the fritters up in.

As a variation, you could sprinkle your fritters with cinnamon sugar instead of powdered sugar.

Did I mention these were REALLY good?

Wednesday, May 9, 2012

Baked Eggs in Prosciutto Cups


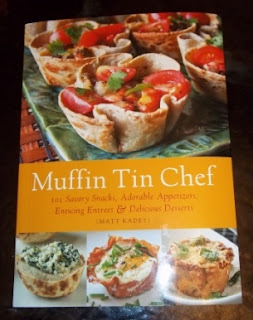
Since my day job finds me in the final throes of Sunday's graduation preparations, I'm going back to the Muffin Tin Chef for a little assistance with tonight's post.

This one looked simple and simply delicious so I thought I'd give it a whirl.  Don't know if you're as big a fan as I am of breakfast for dinner, but this variation on bacon and eggs is definitely worth trying.

Baked Eggs in Prosciutto Cups
Morning Glories: Breakfast & Brunch
Page 14, Muffin Tin Chef

12 thin slices prosciutto
2 tbsp grainy mustard or Dijon mustard
1/4 cup finely chopped basil
1/3 cup grated Parmesan cheese (about 1 oz)
6 large eggs
chopped fresh chives, for garnish
salt and pepper

Preheat the oven to 375 degrees.  Grease 6 medium muffin cups with oil or butter and line each with 2 slices of prosciutto, enough to cover the bottom and sides completely.

Because the prosciutto slices were long, I folded mine
them in half so ended up with four layers per cup.

Spread mustard on the bottom of the prosciutto-lined cups, and top with basil and cheese.  Press down lightly on the cheese to make room for the eggs.

Couldn't find any fresh basil, so used a basil paste,
it may not be fresh, but it smells amazing.
I forgot to pick up a block of Parm at the store to
hand grate so used the shaker kind and found I
didn't need to press down the cheese to make room.

Carefully crack an egg into each prosciutto cup.  Season the tops of the eggs with salt and pepper.


Place the muffin tray on a baking sheet to catch any egg overflow.

Bake until the egg whites are set but the yolks are still slightly runny, about 17 minutes.


Let cool for 5 minutes before unmolding.  Garnish with fresh chives.  Serves 3.

NOTES

Author's Note:  "Prosciutto is a thinly sliced cured ham originally from Italy and a wonderful alternative to bacon in this recipe.  Unlike most muffin tin creations, these don't make good leftovers, so only prepare what you can eat at once.  They can also anchor a dinner mean.  Serve with a crusty bread for dipping into the runny yolks."

In case you missed it Sunday, this recipe is from Muffin Tin Chef by Matt Kadey (Ulysses Press, 2012, ISBN 987-1-61243-052-2).

This is the paste I used, see it even claims "chopped fresh" so it kind of counts. Did I mention it smells great?

Sunday, May 6, 2012

Check It Out: Do you know the Muffin Tin Man?


I have a new favorite cookbook I want you to check out!  It's fun and funky and different and chocked full of really good sounding recipes like Pancetta Cups with Fig Jam, Pretzel Rounds with Honey Mustard Dipping Sauce, Meatloaves with Chimichurri Sauce, and Frozen Berries with White Chocolate Cashew Cream.  Tempting, huh?  And the cool part?  They're all made using a muffin tin.

I really think that you are going to love cooking from Muffin Tin Chef: 101 Savory Snacks, Adorable Appetizers, Enticing Entrees & Delicious Dessers by Matt Kadey (Ulysses Press, 2012).  My friend Ducky was in town this weekend and picked this one out for me to try and to share with you.  She made a good choice, I hope you think so too.

Sweet Potato Shepherd's Pie
Main Dishes, page 90, Muffin Tin Chef

2 medium sweet potatoes, peeled and diced
1 tbps unsalted butter
1/4 tsp ground nutmeg
2 tbsp flour
1 tbsp grapeseed or canola oil
1 small onion, finely diced
1 medium carrot, finely chopped
1 medium turnip, finely chopped
3 garlic cloves, minced
1/2 cup frozen corn kernels
2/3 pound ground turkey breast or chicken breast
1/2 cup bread crumbs
2 tbsp tomato paste
2 tsp grainy mustard or Dijon mustard
1 large whole egg, lightly beaten
1 large egg white
1 tbsp fresh thyme or 1 tsp dried thyme
1/4 tsp salt
1/4 tsp pepper
1/2 cup grated Parmesan cheese (about 2 oz)

Steam or boil the sweet potatoes until very tender.  Transfer to a medium bowl and mash with the butter, nutmeg, and flour; set aside.


Heat the oil in a large skillet over medium heat.  Cook the onions, carrot, turnip, and garlic until the vegetables are tender, about 8 minutes.  Sitr in the corn and cook until the corn is tender, about 1 minute.


Preheat the oven to 350 degrees.  In a large bowl, mix together the turkey or chicken, cooked vegetables, bread crumbs, tomato paste, mustard, whole egg, egg white, thyme, salt and pepper.


Divide the mixture among 12 medium muffin cups.  Spread the sweet potato mixture over the meat and top with the Parmesan cheese.


Bake until set, about 25 minutes.  Let cool for several minutes before unmolding.

NOTES

This is one time I will NOT tell you it's okay to substitute beef or pork for the ground turkey or chicken.  The reason being that the latter doesn't cook off any grease that would sit in the bottom of the tin cups and make the pies unpalatable, the former would.

I chopped my veggies pretty small, but they could have been even smaller and it would have worked out okay.  It would have cut down the chances of the pies fallen apart when being removed even more.

When removing the pies from the cups, make sure to loosen around the edges first and then make sure to support the bottom when pulling out.  Again this is where making my veggie cuts even smaller would be helpful, making the pies less chunky.

If you decide you want to use potatoes instead of turnips, like I almost did, make sure they are parboiled before throwing into the skillet.  If you start with raw potatoes, they won't cook as well or as fast as the other ingredients and might still be "al dente" when you serve the pies.

More detailed information about the book, ISBN 978-61243-052-2, 160pp, 6.5 x 9" paperback, $15.95.  It's got lots of sexy color photos of the products and yes, I already know that my final product doesn't look as glamorous as what's in the book, but it still tastes as delightful as it sounds.


Wednesday, May 2, 2012

Just a quick note...

So there's been a lot of "sharing" going around at work and I managed to bring home a sweet little virus that had me laid up on the couch all day with a problematic stomach which is not at all condusive to playing in the kitchen so I will not be bringing you a recipe tonight. :(

BUT I'm assured I will be up and cooking again this weekend and as a bonus, I may throw in the homemade gatorade drink recipe that the doctor gave me...once I try it out a couple times first.

So have a good evening and I'll be back soon.  Promise!