Google Groups
Subscribe to The Culinary Creative
Email:
Visit this group
Showing posts with label bread. Show all posts

Wednesday, November 19, 2014

Flatbread Pizza with Spaghetti Squash, Pear, Brussel Sprouts and Balsamic Drizzle


Okay that's a very long name for a food, but no real easy to shorten it so there you go.

Though I took a short sabbatical from posting, food is never far from my mind and I'm looking forward to bringing you some new fall dishes and dessert treats as we go into the holiday season.

But to start, brussel sprouts...they really are the most adorable little mini cabbages!  Teeny and delicious and very fun to cook with.  So the inspiration for this pizza came from the flatbread appetizer I'd mentioned last time. Made one or two K2 alterations and voila! Something new and exciting.

Flatbread Pizza with Spaghetti Squash, Pears, Brussel Sprouts and Balsamic Drizzle
Since this is a pizza recipe, I don't have exact measurements for everything, just adjust the amounts to what you like and go from there.

Flatbread rounds
Olive oil
Spaghetti squash, roasted and "spaghetti'd"
Brussel sprouts, quartered
Pear, sliced thin
White cheddar cheese, shredded
1/4 cup balsamic vinegar, reduced

PRE-PREP

Spaghetti Squash -- cut the squash in half, scoop out the guts, bake at 350 degrees (face up) for 30-40 minutes.  Take a fork and scrape the insides out to spaghetti it.


Brussel Sprouts -- quarter the sprouts and dry fry them (no oil or coating) in a non-stick pan for 4-5 minutes or until fork tender (and not zombified).


Pear -- slice the pear very thin (1/8") and dry fry them in a non-stick pan for 2-3 minutes or until almost translucent.


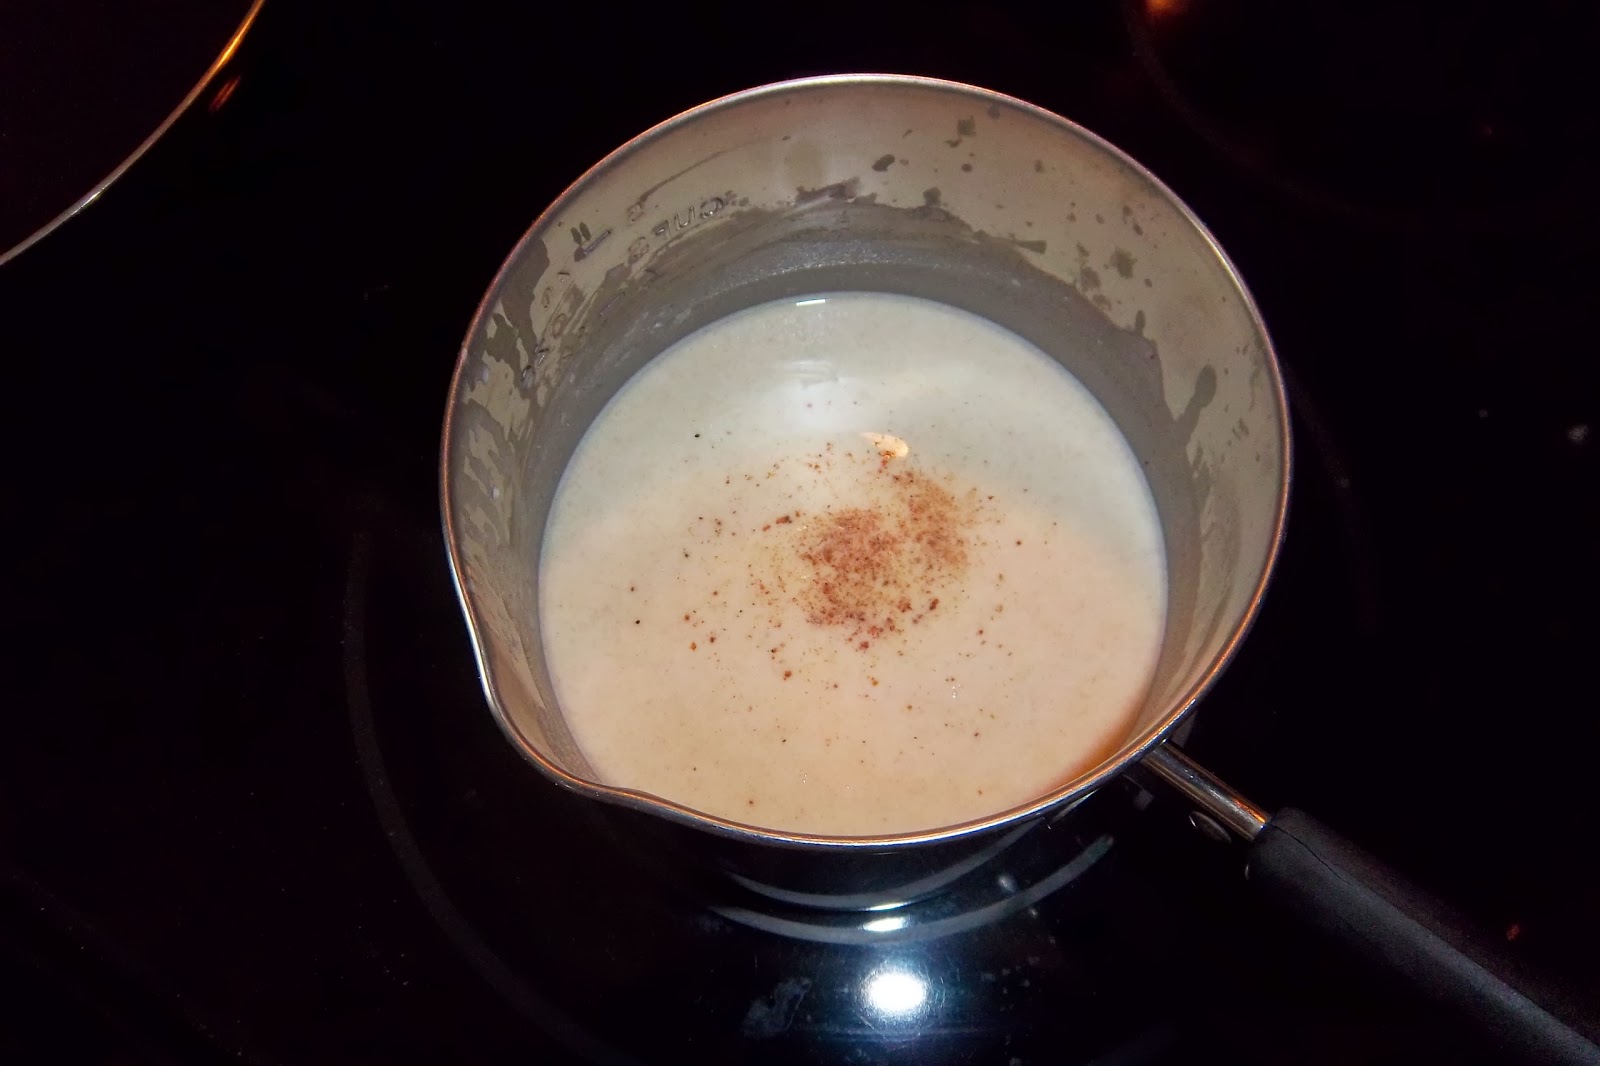
Balsamic Vinegar -- in a small saucepan, bring 1/4 cup balsamic to a boil, allow to boil for 3-4 minutes, until it starts to reduce.  Set aside and let it continue to reduce in the pan away from the heat. You can use whatever type of balsamic you'd like, I actually had a sample bottle of Cranberry Pear Balsamic that really did the trick.

LAYERING

I brushed my flatbread with olive oil to give it a minimum coating and add some moisture.

Then I laid my pear slices down, sprinkled them with the shredded white cheddar.

Next I added the brussel sprouts and covered it all with a thin layer of the spaghetti squash.

Finally, I drizzled a moderate amount of the balsamic reduction across the top of the pizza.


Baked at 350 degrees for about 10 minutes, though you can do less time or more time depending on how done you like your pizza.

All that's left is to slice and enjoy.

Little shout out here to my friend Bethany who served as guinea pig on this my latest culinary experiment.  It got a two thumbs up so I think you're going to like it too.


.

Wednesday, February 5, 2014

Homemade Croutons

 
I like to think of this as a "wing and a prayer" recipe.  I invited some friends over to watch basketball this past weekend.  Since they were bringing the pizza I thought I'd toss together a big salad to go with.  Knowing that my friend Jan is a big fan of the crouton salad accessory and knowing I had the butt end of a couple artisan loaves sitting in the cupboard, I figured I'd get online and find a make-it-yourself recipe.

What's that thing about best laid plans?  Well about 10 minutes before they were to show up at my door I realized I'd not gotten online and not found a recipe, so instead I "wung" it.  Gotta say, I was pleasantly surprised by the results and will be adding these delicious tidbits to many more of my future salads.

I hope you enjoy them as much as we did.

K2's Holycraptheyaregoingtobehereanyminute Croutons

3 cups old artisan bread (but not moldy bread), cut into cubes
1 tsp. Italian seasoning
1 tsp. garlic salt
3-4 spritzes spray butter or 1/2 tbsp. butter melted

Before you begin, preheat your oven to 350 degrees.

In a small bowl, toss together the bread cubes, seasonings, and butter.  They don't need to be saturated or overly coated, just a couple of light turns around the bowl should do.


Pour the coated bread cubes into a small baking dish or onto a small cookie sheet.


Put them in the oven and set your oven on broil.

Stir/flip the cubes every 1-2 minutes until browned along the outer edges. Should take about 5-6 minutes total, if even.

Once nicely browned, turn the oven OFF and leave the croutons in the oven for another 3-4 minutes.  This will allow them to dry out in the center, but not burn.


Remove from oven and toss on salad...or in mouth...

NOTES

I buy artisan bread loaves (not bagged sandwich breads) which tend to be denser and work best for making croutons.

Wednesday, December 4, 2013

Cheesy Olive Buns

 
Holidays! Holidays! Time for some fun festive foods.  Let's start out with a little salty goodness.  I've found variations of this throughout my cookbooks from the '60s and '70s.  For those who don't like olives (I know Wendi is making her squiggy-ewww face right now) this is probably not going to be the recipe for you, but if you're going to be doing a little holiday imbibing, this makes a great date for your drink.

Cheesy Olive Buns 

1 (8 ct.) roll buttermilk biscuits
24 stuffed green olives
1/4-1/3 cup grated parmesan

Drain and pat dry the olives.  Set aside.


Layout the biscuits and cut into thirds.


Wrap each section around an olive and press seams closed.


Roll in parmesan and set on a prepared cookie sheet.


Bake at 450 degrees for 6 minutes or until golden brown.


Remove from cookie sheet and set on a rack. Serve up hot or at room temp.

NOTES

Most grocery stores will carry an assortment of olives.  You can find them stuffed with almonds (which is what I used), bleu cheese, garlic or jalapeno.  Pick your favorite and use that.

If you're using small olives, you can always cut the biscuits into 4 pieces each and proceed as planned.

Wednesday, October 30, 2013

Special Dark Raspberry Rolls

 
Okay, making the break from apples.  It's almost Halloween and chocolate is the order of the day so to that end, here is a little bit of yumminess that I came up with. 

Now after seeing these, I'm sure you're thinking, K2, didn't we just see a roll-up treat?  Yes...yes, you did.  But I have a crescent roll addiction that must be fed.  I can't help it, they're delicious and go well with so many other tasty things which is why when the Parentals came back from their trip to Hershey, PA, burdened with glorious chocolate, I had to roll out the Pillsbury standby and do something fun with my part of the chocolate booty.

Trust me, when you stop shoveling these in your mouth, you'll thank me. Or a chocolate-covered thumbs up will suffice.

Special Dark Raspberry Rolls
make 1 dozen

1 (8 ct.) pkg. of Pillsbury crescent rolls
2 tbsp. seedless raspberry jam
1/3 to 1/2 cup Special Dark chocolate chips
4 tsp. sugar
1 tsp. cocoa powder

In a small dish, blend together the sugar and cocoa powder.

Pop open your Pillsbury and spread the dough out.  Press together the lengthwise seam between the crescents, then cut each of the four new dough pieces into thirds the short way.

I only worked on one half of the dough at a time
and yes, I used my fish cutting mat 'cuz that's how I roll

Spread raspberry jam on each of the pieces.


Sprinkle with Special Dark chips.


Roll them up and then roll them in the cocoa sugar.

 
Place on a prepared cookie sheet.


Bake at 375 degrees for 12 minutes, or until nicely browned and not squoogey inside.


Allow to cool for a minute or two before consuming, because that chocolate is going to be HOT!

In case you were wondering, they go great with a big bowl of French vanilla ice cream.


Sunday, September 8, 2013

Homemade Tortillas

 
Ummm...so I haven't found a buckwheat flour recipe I like yet.  It's actually trickier than I thought it might be and I may just throw in the towel and just do some buckwheat pancakes. BUT, until then, here is a little something different.

When I went to buy the buckwheat flour, I came across some masa harina which is the corn masa flour used to make tortillas which gave me a craving for Mexican food.  In addition, I've never made tortillas from scratch before so I thought it would be fun to try.


My tortillas were not beautiful, by any means, but they were tasty.  Had that fresh tortilla smell and flavor.  Add in some of my favorite fillings and voila! Muy delicioso!

Homemade Tortillas

2 cups masa flour
1 cup water

Mix together masa flour and water to form a soft malleable dough.  Add water or masa as needed to get the right consistency.

 
Knead for 5 minutes, then form into small balls (about 1-1/2" each) and allow to sit for 20 minutes.


Once the dough has rested, roll the balls out as thin as possible.


I followed the recipe on the back of the bag to make these and found that I actually ended up rolling two small balls together to make one tortilla.  My dough was a little drier than was good for rolling out without breaking along the edges.  A slightly more pliable dough would have rolled out more easily.

Put the tortilla in a heated greased pan and cook for 2 minutes per side.


Ready to serve.

Sunday, August 11, 2013

Johnnycakes with Black Bean-Turkey Sausage Chili

 
Since I brought back a bag of Geechie Boy cornmeal, I thought I would try to find something to do with it other than make cornbread (too obvious).  What resulted was...interesting.

I'd always heard the term "johnnycakes" but was never 100% sure what one was so I did a little research.  Basically they are cornmeal pancakes without the sweet taste. They are also sometimes called "journey cakes" and historically they were a quick and easy grain made by frying up corn gruel in a skillet, made them easy to eat and travel with.

You don't want to eat them by themselves, that's for sure, so tonight I have included one of my what's-in-the-cupboard-chili recipes for you to try with it.

Johnnycakes

1-1/2 cups white cornmeal
3/4 tsp salt
1 cup boiling water
1/2 cup milk
cooking spray (or bacon drippings if you've got them)

Mix together the cornmeal and salt and set aside.


After you boil some water, measure out a cup and pour into the cornmeal and salt.  Mix in your milk until texture is consistent.  Will be thickish like pancake batter.


Pour 1/3 cup batter into a hot skillet prepared with cooking spray (or bacon drippings if you've got them).


Cook until brown on one side and flippable.  Then flip over and continue cooking until both sides are browned.


Serve up while hot.

K2's Black Bean-Turkey Sausage Chili

1 (15 oz.) can black beans, NOT drained
1 (15 oz.) can dark red kidney beans, drained
1 (10 oz.) can Ro-Tel diced tomatoes and green chilies
1 (10 oz.) can sweet corn, drained
1 (8 oz.) can tomato sauce
2 cups Jimmy Dean's Turkey Sausage Crumbles
2 tbsp. chili powder
1 tbsp. cumin
1/3 cup sliced green olives (optional)
salt and pepper, to taste

Put all the ingredients in a deep dish skillet and cook for at least 35 minutes, stirring occasionally, over medium heat.

Garnish with shredded cheddar and/or sour cream and a johnnycake or two.

Sunday, June 23, 2013

Scallops Bechamel on Toast


Since I'm in Maine visiting relatives, I figured it would be an act of sacrilege to leave the state without whipping up a little fresh seafood something-something.  Fortunately I have a generous family who stepped up to be my taste testers.  :)

I was going to call this "Chipped Scallops on Toast" a la "Chipped Beef on Toast" but my retired military uncle reminded me of the no-so-flattering nickname given to that taste treat, so I went with something a little more appealing.  No matter what you call it though, it is D-lish!

Scallops Bechamel on Toast

bechamel sauce
2 cups milk
4 tbsp (1/2 stick) butter
1/2 cup flour
1/4 tsp white pepper
1/4 tsp salt
1/8 tsp nutmeg

scallops mix
1 lb. fresh sea scallops, cut in half (or quarters depending on their size)
1 cup shitake mushrooms, chopped
1/2 cup ham steak, small diced
1 small onion, diced
1 tbsp minced garlic
1 tbsp olive oil

soft crusted French baguette, sliced
1-2 tsbp parmesan cheese

To make the sauce:

In a small saucepan, scald milk (aka heat to almost but not boiling).

In another heavy bottom saucepan, melt butter over low heat. Whisk in flour and blend until it forms a roux, cook for 1 minute then remove from heat.


Pour in half of the heated milk and mix until the roux is incorporated.


Return to low heat and stir until it thickens.  Add in rest of heated milk with white pepper, salt, and nutmeg.  You can adjust the seasoning to taste.


Remove from heat and set aside.

To prepare the scallop mix: 

Heat oil in a large skillet over medium heat.  Add in onions and garlic.  Cook 2-3 minutes or until the onions start to turn translucent.


Add in the scallops and cook for 3-4 minutes or until the scallops start turning opaque white (half cooked).

Add in the diced ham, and cook for 1-2 minutes.


Add in chopped shitake and cook for 1-2 minutes.


When the scallops are completely cooked, reduce the heat to low and pour in the prepared bechamel sauce.  Mix well, the sauce will thicken as it sits.


Remove from heat.

Slice the baguette into 1" thick slices (cut on a diagonal to make larger pieces).


Place the slices on a cookie sheet covered with foil.  Place the cookie sheet in an oven pre-heated to 350 degrees.  Toast until the top half starts to crisp up, then turn them all over and continue to toast until the second side is crispy as well.

Remove from oven.  Cover each slice with a generous spoonful of the scallop bechamel.  Sprinkle with parmesan cheese.


Set the oven to broil and place the cookie sheet under the broiler.  Cook for 1-2 minutes until tops are toasted.  Remove and serve.

NOTES

Want to send a special shout out to my favorite Maine-iacs for letting me commandeer the kitchen and use them as my guinea pigs.

From the oohs and aahs and happy grunting noises, I took that to mean the family thought it was pretty good.  It is fairly rich so be warned.

You want a soft bread to toast so that it will be crunchy (versus chewy). 

All of the chops and dices were small so that biting into the toast would be easy and not messy.


These can be made into appetizers or a meal, depending on how big you cut your bread.

Sunday, April 28, 2013

"Khan" Cakes (aka Corn Cakes)


In preparation for the upcoming release of Star Trek: Into Darkness, some friends and I decided to have a Star Trek sleepover this weekend.  In case you were wondering, the answer is No, you can never be too old for a sleepover.  In honor of the occasion, we donned our finest Vulcan ears and indulged in some Star Trek-themed eatin's.

My cousin whipped up some delicious "Khan" Cakes for the occasion and since I'm still rolling with a spring veggie theme, I asked if she'd mind if I shared the recipe with you all and I grabbed some off-the-cuff photos.

For those who are not dedicated Trekkies, but fans of Earth-grown corn, I think you'll enjoy these just the same.  The sweet taste of the grilled corn goes really well with the fresh basil.  Not a combo I've tried before but now I'm hooked.

"Khan" Cakes
(aka Corn Cakes)

3 ears fresh grilled corn
1 (6 oz) pkg buttermilk cornbread mix
2/3 cup water
1/4 cup fresh basil, chopped

Husk your ears of corn and wrap them each in aluminum foil with a dab of butter.  Cook them on a grill over medium-high heat for 10 minutes, turning every 2 minutes for even cooking.

Remove from grill and unwrap from foil.  Let them sit for a minute to cool while you prepare the batter.

In a medium size bowl, combine the cornbread mix and water until smooth.  Fold in the fresh basil, then set aside.

With a knife, cut away the kernels from the ears of corn and add to the batter mix.

 
Pour about a 1/4 cup of batter for each corn cake onto a hot, lightly greased griddle.  You want to set your griddle on medium-high for this.


Cook the corn cakes for 3-4 minute per side, or until the top bubbles up and the edges look cooked.
 

Remove when both sides are golden brown.  Ready to eat!

NOTES

If you don't have a grill, you can boil the corn, but I would recommend grilling if you can.

Boiling corn will actually leach some of the flavor from the veggie and you don't want to miss out on the sweet grilled taste of the corn.  A better alternative would be to microwave the corn instead.  Just wrap the corn in some waxed paper and cook on high for about 2-3 minutes.

Want to send a shout out to Dana and Mike for being excellent Federation hosts and to Jen for coming up with the recipe to share!  Eat Long and Prosper, my friends.