Google Groups
Subscribe to The Culinary Creative
Email:
Visit this group
Showing posts with label candy. Show all posts

Friday, April 3, 2015

Peeps Potato Pie


I don't often toss out the word "genius" when I describe my cooking, but I'm making an exception this time.  This was one of my drive-home-from-work-thinking-of-food inspirations.  If you love Peeps as much as I do (and you know you do) and are a fan of sweet potatoes, then you will love this Just in Time for Easter dessert.

The best part about it, sweet potatoes rank number one in healthiest vegetables and Peeps inspire happiness so this pie is both good for your body and your soul.  You're welcome.

I'd like to dedicate this post to my peep Mary BB whose love and appreciation of Peeps is only match by my own.

Peeps Potato Pie

2 large sweet potatoes (approx. 1 lb.)
1/2 cup (1 stick) butter, softened
1 cup sugar
1/2 cup milk
2 eggs
1 tsp. vanilla
1/2 tsp. cinnamon
1/2 tsp. nutmeg
1/8 tsp. ground cloves
1 (9") deep dish pie crust

Boil sweet potatoes (with the skin on) for 45 minutes or until very fork tender.


When done, drain boiled water and replace with cold water.  Allow to sit for about 3-4 minutes.

Remove sweet potatoes from water and peel off the skin. Should come off very easily.


Mash sweet potatoes in a large mixing bowl, add butter and cream until fully incorporated.


Add the sugar, milk, eggs, vanilla and spices.  Mix until batter is smooth.  It will be very liquidy but that's what you want.


Pour batter into the pie crust and bake for 45 minutes at 350 degrees.


In the meantime, pull apart your Peeps and if so inclined, plan out your Peeps pie layout. I found this made the transition to pie top much easier.


After pie has been baking for 45 minutes, add Peeps layer to the top and continue baking for 10-15 minutes.


Remove from oven and allow to cool and set. Garnish with Peeps if desired.


NOTES

I chose orange bunnies because they complimented the color of the sweet potatoes. But as you know there are many options available so if you feel like blue chicks will work better for you, then go for it.


I call this one "Last of the Mohpeepkins"

If you want your Peeps less melty as not to traumatize the children with so many toasted bunny corpses then bake pie for 50 minutes, top with Peeps and put back in oven for 5-10 instead. When you put them on is entirely up to you.

Good Friday everyone and Have a Happy Easter!

Tuesday, December 30, 2014

Dark Chocolate Salted Caramel Pecan Fudge


I am discovering that my favorite treats to experiment with are ice cream and fudge.  When you can establish a good base recipe, it makes an excellent platform for experimentation.  I like to explore new taste options or try variations on things I've tasted elsewhere. As salted chocolates are still pretty trendy, I thought I'd give it a whirl myself.

If you are looking for an easy-to-make hostess gift for New Year's, I think you should try this.

DARK CHOCOLATE SALTED CARAMEL PECAN FUDGE

2 cups dark chocolate chips
1 cup milk chocolate chips
1 (14 oz.) can sweetened condensed milk
1/2 cup chopped pecans
1/2 cup caramel bits
1 to 1-1/2 tbsp. grinder salt

In a deep saucepan over low heat, melt together the chips and condensed milk until smooth and well blended.


Fold in the pecans and caramel bits and pour into an 8" x 8" (or 9" x 9") baking pan lined with wax paper, and spread out evenly and smoothly.


Sprinkle the salt on top.

Put in the fridge to set for at least 30 minutes before removing and cutting into bite-sized pieces.

Ready to package or to nibble at your leisure.

NOTES

I found some caramel bits at Southern Season in Charleston which I used for this recipe, but Kraft makes caramel bits too.  If you can't find those, you can small dice the wrapped caramels to add to the mix.


I also used Celtic Sea Salt (a Christmas gift from my good friend CJ) as my salty sprinkle, but you can use whatever kind you'd like.  You want a nice rough grain salt to stand out on top of your treat. 


Treat boxes are pretty easy to find these days, I get mine from Not Just Paper in Durham, NC (red ones), but you can also find them in Michael's or AC Moore's (usually white ones).  I use 1/2 pound boxes lined with wax paper.


Then I either pre-cut the fudge into bite-sized pieces (will fit 8-10 depending on what you call bite-sized) or cut out a piece that just fits in the box and include a little plastic knife in the box so your recipient can cut their own pieces.  Tie up with a decorative ribbon and you're all set.

Sunday, October 26, 2014

Ooey Gooey Crunchy Chewy Monster Eyeballs


I know using "eyeballs" in a food title is problematic but it's almost Halloween!!!  I will warn you that while these are adorably disturbing, they are a little messy to make...but delicious.

Ooey Gooey Crunchy Chewy Monster Eyeballs

1-1/4 cup dried apricots, small chopped
1 cup dates, small chopped
1 cup pecans, small chopped
1 cup flaked, sweetened coconut
1 can (14 oz.) condensed milk
4-5 graham crackers, crushed
1 (16 oz.) package milk chocolate CandiQuik
Wilton candy eye

In a large bowl, mix together dried apricots, dates, pecans and coconut.  Add the condensed milk and mix until well blended.


Put the mixture in the fridge for about 30 minutes, letting it firm up.


Add enough crushed graham crackers to keep the mixture from being too moist and enough that you can easily roll it into 1-1/2" balls.  Place balls on a cookie sheet covered with wax paper.


Melt the chocolate bark over low heat.  Once ready to go, dip the balls in the chocolate, shake off any excess, and replace on wax paper.  Pop a candy eye on the top before the chocolate hardens.


Spooktacular!  Nice little rush sugar for all the little ghoulies to enjoy.

Sunday, March 2, 2014

Parsnip-Almond Chocolates

 
Okay, so who's an evil culinary genius...ah, that would be me.  You may be cringing a bit at the idea of parsnip-almond chocolates, but SUCCESS!  I think they are delish! 

Parsnip-Almond Chocolates

3/4 cup grated parboiled parsnips
1/2 cup almond slices, food processed fine
2 tsp. sweetened condensed milk
3/4 cup dark chocolate, melted

Cook a parsnip until fork tender.  I cut a large parsnip into large pieces and cooked them on high for 4-5 minutes.


Once the parsnips are cooked, allow to cool to room temperature before grating. 


I used almond slices instead of whole almonds to process because it took less time and I was able to get them into smaller pieces quicker since they were already sliced.


In a bowl, mix together the grated parsnips, almond crumbs, and condensed milk.  Once mixed, chill the mixture until ready to roll.


In a small pan over low heat, melt your chocolate pieces.


Remove mixture from fridge and roll into 1" balls.  Put back in the fridge to firm up.


Dip the balls in the chocolate, coating them thoroughly and set on a piece of waxed paper.


Once all the balls are coated, put back in the fridge and allow the chocolate to set.


Remove from fridge and impress yourself, wow your friends, and the blow the minds of total strangers. :D

Wednesday, October 23, 2013

Turtle Bites

 
So what do you do with leftover melted chocolate when there are no more caramel apples to coat?  You make Turtle Bites, of course.

I had grand plans of actually making my caramel coating for my last post from scratch so had bought a bag of caramels...which accidentally got opened in the interim and someone (I think it was the cats) started eating them so there wasn't really enough to make a full batch of dipping caramel.  But I digress.


Since I had the caramels on hand and always keep my freezer well-stocked with NC shelled pecans, I threw them together with the rest of the chocolate candy melt.  Waste not, want more.

Turtle Bites

2 dozen caramels, unwrapped
2 dozen pecan halves
4-6 oz. chocolate candy melt, CandiQuik or candy coating

Cut the caramels in half with a paring knife.


Put a pecan half between the caramel halves and gently mash and smoosh the caramel around the nut. 

Using a fork, dip the ball of caramel and pecan in the melted chocolate.  Shake lightly to allow excess chocolate to fall off.


Set on a sheet of wax paper and allow to set.


Sea Turtle Variation

I didn't think of it until after I'd make all of my chocolates, but if you wanted to try something a little fancy, sprinkle a few grains of sea salt on the candies before the chocolate sets.  Mm-mmm.

Sunday, September 29, 2013

Witchy-Poo Cookie Craft (It's Edible!)

 
And so it begins, the ramp-up to my favorite holiday.  YAY!  This weekend I was invited to keep my friend Michelle company while she hosted her 8-year-old daughter's Halloween-themed sleepover.  One of the fun projects on the evening's docket was decorating cookie ball witch heads.  She thought it might be a fun project to share with you and I very much agreed.

If you are brave enough to try this with your kiddoes (or growed-up friends), I would recommend following it up with an activity that let's them run off the sugar rush that follows.  You have been warned.

Witchy-Poo Cookie Craft

witch heads
1 pkg. (16 oz.) ready-to-bake sugar cookie refrigerated dough
1 can white icing
1/2 (12 oz.) bag of green candy melts


hats and parts
8 sugar cones (hat tops)
16 thin chocolate wafer cookies (hat brims and collars)
chocolate icing (for hats)
licorice strips, Twizzlers, or sour straws (hair)
chocolate-covered sunflower seeds (for noses)
candy eyes or flat sprinkles (for eyes)
assorted Halloween sprinkles (hat decoration)

chocolate-coated sunflower seeds
 
Sorry no photos for the first couple of steps, I got so carried away with what we were doing that I forgot to grab some photos.

For the witch heads, you need to bake the sugar cookies according to the package directions EXCEPT that you want to cook them for the least amount of time listed.  The cookies should be on the slightly undercooked side (very chewy, little to no crunchy). 

When the cookies are done baking, transfer them to a rack to cool completely.

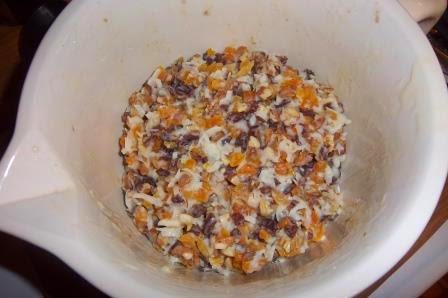
When the cookies are cool, put them in a food process and run until they are little crumbles.

Mix the cookie crumbles with 1/2 cup of white icing and moosh together until it forms a (not smooth) dough.  Because you undercooked the cookies, the crumbles will be moist and dough will be more malleable.

Roll the dough into eight (8) 2" balls.  Set on a plate and refrigerate for at least 30 minutes.


When the dough balls are ready, remove from fridge and set aside while you melt the green candy pieces.  In a thick bottomed saucepan over low heat (setting 2 or 3) or in a double broiler, stir candy pieces until fully melted and smooth.


Dip the balls in the melted candy and roll around until well-covered.  Remove and set each ball on a thin chocolate wafer cookie.  Smooth down the chocolate with a butter knife or small spatula.  The candy will set within 5-10 minutes.

The only other pre-decorating frenzy prep we did was to pull apart the licorice strips so the girls didn't have to do it.  We used Cherry Twizzlers which we cut in half lengthwise and then separated into strands of threes.

 
Each girl then got a plate with a blank witches head, the hat parts and some hair and license to go crazy.


It was a fun project and everything is edible.  The results were adorable and the girls had a great time building their masterpieces.

 
NOTES

We learned the hard way that you want to make sure to put the candy-coated cookie balls on the cookie wafers right away, or at least on a sheet of parchment or wax paper, because the candy coating will start to harden immediately and then need to be pried off the plate that you unwittingly put them on to start with.

If you want different color hair, Punch Straws would work, they have a sugary coating though so won't look the same as the licorice or Twizzlers.

You can usually find chocolate-covered sunflower seeds in specialty stores or grocery stores that stock non-traditional candies.  Michelle got hers at Trader Joe's, I believe.

The eye candies and Halloween sprinkles can be found at Michael's or A.C. Moore's craft stores, or any place that sells Wilton products.

Other variations -- use white candy melts and decorate them as vampire heads or instead of cookie balls, make cookie cylinders, cover them with the green candy coating and decorate them as Frankenstein heads.  Get creative and go crazy with it, there's no wrong answer here.